(removing copyright) |
m (changing various links Project:Bot requests) |
||
| (32 intermediate revisions by 14 users not shown) | |||
| Line 1: | Line 1: | ||
| − | This is part of the [[Pokémon Diamond/Pearl Walkthrough]], with the following locations: [[Twinleaf Town]], [[ |
+ | This is part of the '''[[Pokémon Diamond/Pearl Walkthrough]]''', with the following locations: [[Twinleaf Town]], [[Verity Lakefront]], [[Lake Verity]], [[Route 201]] and [[Sandgem Town]]. |
Click [[Pokémon Diamond/Pearl Walkthrough (Part 2)|here]] for Part 2. |
Click [[Pokémon Diamond/Pearl Walkthrough (Part 2)|here]] for Part 2. |
||
=Twinleaf Town= |
=Twinleaf Town= |
||
| − | + | {{Main|Twinleaf Town}} |
|
| ⚫ | In [[Pokémon Diamond and Pearl]] and [[Pokémon Platinum]], '''Twinleaf Town''' is the character's home town. This is the first time that there is not a Pokémon Lab in the starting town. It has four houses, the house in the bottom right hand corner is the character's house. The house in the upper left hand corner is the character's rival's house. Twinleaf Town also has a small lake at the very bottom. |
||
| − | |||
| ⚫ | In [[Pokémon Diamond and Pearl]] and [[Pokémon Platinum]], '''Twinleaf Town''' is the character's home town. This is the first time that there is not a |
||
==Pokémon Appearances== |
==Pokémon Appearances== |
||
| − | |||
{|border="1" cellspacing="1" cellpadding="1" width="75%" |
{|border="1" cellspacing="1" cellpadding="1" width="75%" |
||
!colspan="5" style="background-color:#ADD8E6; color:#000000;"|All Versions |
!colspan="5" style="background-color:#ADD8E6; color:#000000;"|All Versions |
||
| Line 23: | Line 21: | ||
|100% |
|100% |
||
|100% |
|100% |
||
| − | |Old Rod |
+ | |[[Old Rod]] |
|- |
|- |
||
|[[Goldeen]] |
|[[Goldeen]] |
||
| Line 29: | Line 27: | ||
|35% |
|35% |
||
|35% |
|35% |
||
| − | |Good Rod |
+ | |[[Good Rod]] |
|- |
|- |
||
|[[Magikarp]] |
|[[Magikarp]] |
||
| Line 35: | Line 33: | ||
|65% |
|65% |
||
|65% |
|65% |
||
| − | |Good Rod |
+ | |[[Good Rod]] |
|- |
|- |
||
|[[Gyarados]] |
|[[Gyarados]] |
||
| Line 41: | Line 39: | ||
|65% |
|65% |
||
|65% |
|65% |
||
| − | |Super Rod |
+ | |[[Super Rod]] |
|- |
|- |
||
|[[Seaking]] |
|[[Seaking]] |
||
| Line 47: | Line 45: | ||
|35% |
|35% |
||
|35% |
|35% |
||
| − | |Super Rod |
+ | |[[Super Rod]] |
|- |
|- |
||
|[[Psyduck]] |
|[[Psyduck]] |
||
| Line 53: | Line 51: | ||
|10% |
|10% |
||
|10% |
|10% |
||
| − | |Surf |
+ | |[[Surf]] |
|- |
|- |
||
|[[Golduck]] |
|[[Golduck]] |
||
| Line 59: | Line 57: | ||
|10% |
|10% |
||
|10% |
|10% |
||
| − | |Surf |
+ | |[[Surf]] |
|} |
|} |
||
| − | |||
==Events== |
==Events== |
||
| − | |||
===The Beginning=== |
===The Beginning=== |
||
| ⚫ | |||
| − | |||
| ⚫ | |||
| ⚫ | |||
| − | |||
| ⚫ | |||
===Meet Your Buddy=== |
===Meet Your Buddy=== |
||
| ⚫ | |||
| ⚫ | Head to your friend house located at northwest of Twinleaf Town. When you reach the entrance, your friend will knock into you. Then he went off and came back again to take the things he forgotten. You enter the house and go upstairs, and you will see him packing his things. He will then run downstairs again. Meet him at Route 201. |
||
| − | [[File:Diamond- |
+ | [[File:Diamond-Pearl Twinleaf Town 4.png]] |
| − | |||
| ⚫ | Head to your friend house located at northwest of Twinleaf Town. When you reach the entrance, your friend will |
||
| − | |||
| ⚫ | |||
Then walk to the left of the Route 201 and enter [[Lake Verity]]. |
Then walk to the left of the Route 201 and enter [[Lake Verity]]. |
||
| − | |||
| ⚫ | |||
Note: You must meet your friend in order to access Route 201. |
Note: You must meet your friend in order to access Route 201. |
||
| − | [[File:Diamond- |
+ | [[File:Diamond-Pearl Twinleaf Town 3.png]] |
===After Battle=== |
===After Battle=== |
||
| ⚫ | |||
| ⚫ | |||
| ⚫ | |||
| ⚫ | |||
| ⚫ | |||
| ⚫ | |||
| − | |||
| ⚫ | |||
| − | |||
| − | Click [[Pokémon_Diamond/Pearl_Walkthrough_(Part_1)#Touring Sandgem Town|here]] to continue the story. |
||
===After Visiting Sandgem Town=== |
===After Visiting Sandgem Town=== |
||
| − | |||
Head home to tell your Mum about the big quest you are going to do. Your Mum will then gives you a Journal. Then your friend's Mum will enter. She will gives you a Parcel that your friend forgotten to take. Head to [[Jubilife City]] to pass him the Parcel. |
Head home to tell your Mum about the big quest you are going to do. Your Mum will then gives you a Journal. Then your friend's Mum will enter. She will gives you a Parcel that your friend forgotten to take. Head to [[Jubilife City]] to pass him the Parcel. |
||
[[File:Diamond-Pearl Twinleaf Town 6.png]] |
[[File:Diamond-Pearl Twinleaf Town 6.png]] |
||
| − | Click [[ |
+ | Click [[Pokémon Diamond/Pearl Walkthrough (Part 1)#Catching a Pokémon|here]] to continue to Route 202. |
=Lake Verity= |
=Lake Verity= |
||
| − | + | {{Main|Lake Verity}} |
|
| ⚫ | |||
| − | |||
| ⚫ | |||
==Events== |
==Events== |
||
| − | |||
===First Pokémon Battle=== |
===First Pokémon Battle=== |
||
| ⚫ | |||
| ⚫ | |||
| − | [[File:Diamond- |
+ | [[File:Diamond-Pearl Lake Verity 2.png]] |
| ⚫ | |||
| ⚫ | The professor had left his briefcase on the grass patch and your friend decided to check it out. As you are looking through the briefcase, two [[Starly]]s fly from the surroundings and attack both of you and your friends. Frantically, you decided to open the briefcase and use the Pokémon inside. There are three Pokémon. They are the Grass-type [[Turtwig]], Fire-type [[Chimchar]] and Water-type [[Piplup]]. Choose one of them carefully because it will stay with you for the rest of the journey. |
||
| ⚫ | |||
| ⚫ | |||
| ⚫ | Once you choose your Pokémon, you will then battle with the wild Starly. Tap "Fight" on the tap screen of your Nintendo DS to fight it. Choose the attack and defeat the Starly. This will be your first Pokémon battle. After you defeat it, your rival will comment about the fight. If you use Turtwig, he will use Chimchar. If you choose Chimchar, he will use Piplup. If you take Piplup, he will use Turtwig. |
||
| − | [[File:Diamond- |
+ | [[File:Diamond-Pearl Lake Verity 5.png]] |
| ⚫ | The kid earlier went back to retrieve the briefcase, and finds out that you and your friend have taken the Pokémon from the briefcase. The kid then takes the briefcase and runs away from Lake Verity. Go to Verity Lakefront and chat with the Professor Rowan. The professor will just look at the Pokémon, then walk away. His kid will tell you to visit the lab in [[Sandgem Town]]. You will then return home. |
||
| ⚫ | |||
| ⚫ | The professor |
||
| ⚫ | |||
| ⚫ | |||
| ⚫ | Once you choose your Pokémon, you will then battle with the wild Starly. Tap "Fight" on the tap screen of your Nintendo DS to fight it. Choose the attack and defeat the Starly. This will be your first Pokémon battle. After you defeat it, your rival will comment about the fight. If you use Turtwig, he will use Chimchar. If you choose Chimchar, he will use Piplup. If you take Piplup, he will use Turtwig. |
||
| − | [[File:Diamond- |
+ | [[File:Diamond-Pearl Route 201 1.png]] |
| + | ===Trouble at Lake Verity=== |
||
| ⚫ | The kid earlier went back to retrieve the briefcase, and |
||
| + | Get here as soon as you defeat Saturn in [[Lake Valor]]. You will see Prof. Rowan and asked you to help his grandchild. Defeat the Galactic Grunts on the way. |
||
| ⚫ | |||
| ⚫ | |||
| + | {|border="1" style="text-align:center;" |
||
| ⚫ | |||
| ⚫ | |||
| ⚫ | |||
| ⚫ | |||
| + | !colspan="1" style="background-color:#F5DEB3; color:#000000;"|Male Grunt |
||
| ⚫ | |||
| + | | [[File:PlatinumGlameow.png]] |
||
| + | | [[File:Silcoon(DPP)Sprite.png]] |
||
| + | | [[File:DiamondPearlGolbatMale.png]] |
||
| + | | [[File:PlatinumGlameow.png]] |
||
| ⚫ | |||
| + | |[[Glameow]] ♀ |
||
| + | |[[Silcoon]] ♀ |
||
| + | |[[Golbat]] ♀ |
||
| + | |[[Glameow]] ♀ |
||
| ⚫ | |||
| + | |Lv. 33 |
||
| + | |Lv. 32 |
||
| + | |Lv. 32 |
||
| + | |Lv. 32 |
||
| ⚫ | |||
| + | |[[Pokémon types#Normal-type|Normal]] |
||
| + | |[[Pokémon types#Bug-type|Bug]] |
||
| + | |[[Pokémon types#Poison-type|Poison]] |
||
| + | |[[Pokémon types#Normal-type|Normal]] |
||
| ⚫ | |||
| + | | - |
||
| + | | - |
||
| + | |[[Pokémon types#Flying-type|Flying]] |
||
| + | | - |
||
| ⚫ | |||
| + | !colspan="4" style="background-color:#FFFF00; color:#000000;"|Money: 2600 |
||
| ⚫ | |||
| + | !colspan="4" style="background-color:#FFFF00; color:#000000;"|2nd Group Galactic Grunts |
||
| ⚫ | |||
| + | !colspan="2" style="background-color:#F5DEB3; color:#000000;"|Left |
||
| + | !colspan="2" style="background-color:#F5DEB3; color:#000000;"|Right |
||
| ⚫ | |||
| + | |[[File:DiamondPearlStunky(M).png]] |
||
| + | |[[File:PlatinumGlameow.png]] |
||
| + | |[[File:Beautifly(DPP)SpriteMale.png]] |
||
| + | |[[File:PlatinumGlameow.png]] |
||
| ⚫ | |||
| + | |[[Stunky]] ♂ |
||
| + | |[[Glameow]] ♀ |
||
| + | |[[Beautifly]] ♀ |
||
| + | |[[Glameow]] ♀ |
||
| ⚫ | |||
| + | |Lv. 32 |
||
| + | |Lv. 32 |
||
| + | |Lv. 31 |
||
| + | |Lv. 33 |
||
| ⚫ | |||
| + | |[[Pokémon types#Poison-type|Poison]] |
||
| + | |[[Pokémon types#Normal-type|Normal]] |
||
| + | |[[Pokémon types#Bug-type|Bug]] |
||
| + | |[[Pokémon types#Normal-type|Normal]] |
||
| ⚫ | |||
| + | |[[Pokémon types#Dark-type|Dark]] |
||
| + | | - |
||
| + | |[[Pokémon types#Flying-type|Flying]] |
||
| + | | - |
||
| ⚫ | |||
| + | !colspan="2" style="background-color:#FFFF00; color:#000000;"|Money: 1280 |
||
| + | !colspan="2" style="background-color:#FFFF00; color:#000000;"|Money: 1320 |
||
| + | |} |
||
| + | |||
| + | You will meet Mars talking to Dawn/Lucas. Now, head to Mars and battle with her the second time. |
||
| + | |||
| ⚫ | |||
| + | |||
| + | {|border="1" style="text-align:center;" |
||
| + | !colspan="3" style="background-color:#ADD8E6; color:#000000;"|Commander Mars |
||
| + | |- |
||
| + | | [[File:DiamondPearlGolbatMale.png]] |
||
| + | | [[File:Bronzor(DP)Sprite.png]] |
||
| + | | [[File:PlatinumPurugly.png]] |
||
| + | |- |
||
| + | |[[Golbat]] ♀ |
||
| + | |[[Bronzor]] |
||
| + | |[[Purugly]] ♀ |
||
| + | |- |
||
| + | |Lv. 37 |
||
| + | |Lv. 37 |
||
| + | |Lv. 39 |
||
| + | |- |
||
| + | |[[Pokémon types#Poison-type|Poison]] |
||
| + | |[[Pokémon types#Steel-type|Steel]] |
||
| + | |[[Pokémon types#Normal-type|Normal]] |
||
| + | |- |
||
| + | |[[Pokémon types#Flying-type|Flying]] |
||
| + | |[[Pokémon types#Psychic-type|Psychic]] |
||
| + | | - |
||
| + | |- |
||
| + | !colspan="3" style="background-color:#ADD8E6; color:#000000;"|Money: 3120 |
||
| + | |} |
||
| + | |||
| + | After the battle, she will say that [[Mesprit]], living in this lake, have gone off to help its friend, [[Azelf]], which is captured by Saturn earlier on at Lake Valor, which make them easier to catch. After that, she left the lake. |
||
| + | |||
| ⚫ | |||
| + | |||
| + | Prof. Rowan then talked to you and worried about your rival at [[Lake Acuity]]. That's your next destination. |
||
| + | |||
| + | [[File:Diamond-Pearl Lake Verity 9.png]] |
||
| + | |||
| + | Fly to [[Celestic Town]] now and go to [[Route 211]] at the left. Enter [[Mt. Coronet]]. Head north directly and push the boulder using Strength. After that, head north all the way, then turn left to go below the stairs. |
||
| + | |||
| + | After the stairs, go to the north all the way till you see a stair. Climb up the stairs and go another short route to reach the northern exit of Mt. Coronet to [[Pokémon Diamond/Pearl Walkthrough (Part 7)#Route 216|Route 216]]. Click [[Pokémon Diamond/Pearl Walkthrough (Part 7)#Route 216|here]] when you reach that route. |
||
===Catching Mesprit=== |
===Catching Mesprit=== |
||
| Line 139: | Line 235: | ||
However, once you interact with Mesprit, it will fly away. So you have to find the legendary Pokémon around the Sinnoh grasses, which appear randomly on grassy routes. If you manage to track it, make sure you weaken it. It is OK for it to run away at first, because you can now refer to the map on your Pokétech to found out where Mesprit have gone. Every time you enter a cave, building or going across routes, Mesprit will be found at a different place. So meeting Mesprit is depended on luck. |
However, once you interact with Mesprit, it will fly away. So you have to find the legendary Pokémon around the Sinnoh grasses, which appear randomly on grassy routes. If you manage to track it, make sure you weaken it. It is OK for it to run away at first, because you can now refer to the map on your Pokétech to found out where Mesprit have gone. Every time you enter a cave, building or going across routes, Mesprit will be found at a different place. So meeting Mesprit is depended on luck. |
||
| − | But if you figured out its pattern, find it and track it down. Also, make sure your Pokémon can cast a Sleeping or |
+ | But if you figured out its pattern, find it and track it down. Also, make sure your Pokémon can cast a Sleeping or Paralyzed move, so that Mesprit may not be able to escape easily. [[Golbat]] with the move [[Mean Look]] is a good choice, or [[Trapinch]] with the ability [[Arena Trap]]. Mesprit will retained the HP you weaken it, so you have to meet it several times before it is finally captured. |
Stock a lot of [[Ultra Ball]], [[Timer Ball]] or [[Quick Ball]]. Once you meet it, throw it with a [[Quick Ball]]. If it does not work on the first try, and its HP is about halfway or slightly lesser, throw a [[Ultra Ball]]. If you managed to keep it from escaping, use [[Timer Ball]] to increase its capture rate. |
Stock a lot of [[Ultra Ball]], [[Timer Ball]] or [[Quick Ball]]. Once you meet it, throw it with a [[Quick Ball]]. If it does not work on the first try, and its HP is about halfway or slightly lesser, throw a [[Ultra Ball]]. If you managed to keep it from escaping, use [[Timer Ball]] to increase its capture rate. |
||
| Line 146: | Line 242: | ||
=Route 201= |
=Route 201= |
||
| − | + | {{Main|Route 201}} |
|
| − | |||
'''Route 201''' is located at the north of [[Twinleaf Town]], west of [[Sandgem Town]] and east of [[Lake Verity|Verity Lakefront]]. You can battle the Pokémon the first time but cannot catch it. |
'''Route 201''' is located at the north of [[Twinleaf Town]], west of [[Sandgem Town]] and east of [[Lake Verity|Verity Lakefront]]. You can battle the Pokémon the first time but cannot catch it. |
||
==Pokémon Appearances== |
==Pokémon Appearances== |
||
| ⚫ | |||
| − | |||
| ⚫ | |||
{|border="1" style="text-align:center;" |
{|border="1" style="text-align:center;" |
||
| − | !colspan=" |
+ | !colspan="7" style="background-color:#ADD8E6; color:#000000;"|Pokémon Diamond |
|- |
|- |
||
| − | !style="background-color:#ADD8E6; color:#000000;"|Location |
+ | !style="background-color:#ADD8E6; color:#000000;"|Location |
| − | !colspan="2" style="background-color:#ADD8E6; color:#000000;"|Grass |
+ | !colspan="2" style="background-color:#ADD8E6; color:#000000;"|Grass |
| − | !colspan="2" style="background-color:#ADD8E6; color:#000000;"|Pokémon Radar |
+ | !colspan="2" style="background-color:#ADD8E6; color:#000000;"|Pokémon Radar |
| − | !style="background-color:#ADD8E6; color:#000000;"|Swarm |
+ | !style="background-color:#ADD8E6; color:#000000;"|Swarm |
| − | !style="background-color:#ADD8E6; color:#000000;"|FireRed |
+ | !style="background-color:#ADD8E6; color:#000000;"|FireRed |
| ⚫ | |||
|- |
|- |
||
|Sprites |
|Sprites |
||
| Line 171: | Line 264: | ||
|[[File:DiamondPearlDoduo(M).png]] |
|[[File:DiamondPearlDoduo(M).png]] |
||
|[[File:DiamondPearlGrowlithe.png]] |
|[[File:DiamondPearlGrowlithe.png]] |
||
| ⚫ | |||
|- |
|- |
||
|Pokémon |
|Pokémon |
||
| Line 180: | Line 272: | ||
|[[Doduo]] |
|[[Doduo]] |
||
|[[Growlithe]] |
|[[Growlithe]] |
||
| ⚫ | |||
|- |
|- |
||
| − | | |
+ | |type 1 |
|[[Pokémon types#Normal-type|Normal]] |
|[[Pokémon types#Normal-type|Normal]] |
||
|[[Pokémon types#Normal-type|Normal]] |
|[[Pokémon types#Normal-type|Normal]] |
||
| Line 189: | Line 280: | ||
|[[Pokémon types#Normal-type|Normal]] |
|[[Pokémon types#Normal-type|Normal]] |
||
|[[Pokémon types#Fire-type|Fire]] |
|[[Pokémon types#Fire-type|Fire]] |
||
| ⚫ | |||
|- |
|- |
||
| − | | |
+ | |type 2 |
| - |
| - |
||
|[[Pokémon types#Flying-type|Flying]] |
|[[Pokémon types#Flying-type|Flying]] |
||
| Line 198: | Line 288: | ||
|[[Pokémon types#Flying-type|Flying]] |
|[[Pokémon types#Flying-type|Flying]] |
||
| - |
| - |
||
| ⚫ | |||
|- |
|- |
||
|Morning |
|Morning |
||
| Line 207: | Line 296: | ||
|40% |
|40% |
||
|8% |
|8% |
||
| ⚫ | |||
|- |
|- |
||
|Day |
|Day |
||
| Line 216: | Line 304: | ||
|40% |
|40% |
||
|8% |
|8% |
||
| ⚫ | |||
|- |
|- |
||
|Night |
|Night |
||
| Line 225: | Line 312: | ||
|40% |
|40% |
||
|8% |
|8% |
||
| ⚫ | |||
|- |
|- |
||
|Level |
|Level |
||
| Line 234: | Line 320: | ||
|2 |
|2 |
||
|2 |
|2 |
||
| ⚫ | |||
|- |
|- |
||
!colspan="8" style="background-color:#FFC0CB; color:#000000;"|Pokémon Pearl |
!colspan="8" style="background-color:#FFC0CB; color:#000000;"|Pokémon Pearl |
||
|- |
|- |
||
| − | !style="background-color:#FFC0CB; color:#000000;"|Location |
+ | !style="background-color:#FFC0CB; color:#000000;"|Location |
| − | !colspan="2" style="background-color:#FFC0CB; color:#000000;"|Grass |
+ | !colspan="2" style="background-color:#FFC0CB; color:#000000;"|Grass |
| − | !colspan="2" style="background-color:#FFC0CB; color:#000000;"|Pokémon Radar |
+ | !colspan="2" style="background-color:#FFC0CB; color:#000000;"|Pokémon Radar |
| − | !style="background-color:#FFC0CB; color:#000000;"|Swarm |
+ | !style="background-color:#FFC0CB; color:#000000;"|Swarm |
| − | !style="background-color:#FFC0CB; color:#000000;"|FireRed |
+ | !style="background-color:#FFC0CB; color:#000000;"|FireRed |
| ⚫ | |||
|- |
|- |
||
|Sprites |
|Sprites |
||
| Line 252: | Line 336: | ||
|[[File:DiamondPearlDoduo(M).png]] |
|[[File:DiamondPearlDoduo(M).png]] |
||
|[[File:DiamondPearlGrowlithe.png]] |
|[[File:DiamondPearlGrowlithe.png]] |
||
| ⚫ | |||
|- |
|- |
||
|Pokémon |
|Pokémon |
||
| Line 261: | Line 344: | ||
|[[Doduo]] |
|[[Doduo]] |
||
|[[Growlithe]] |
|[[Growlithe]] |
||
| ⚫ | |||
|- |
|- |
||
| − | | |
+ | |type 1 |
|[[Pokémon types#Normal-type|Normal]] |
|[[Pokémon types#Normal-type|Normal]] |
||
|[[Pokémon types#Normal-type|Normal]] |
|[[Pokémon types#Normal-type|Normal]] |
||
| Line 270: | Line 352: | ||
|[[Pokémon types#Normal-type|Normal]] |
|[[Pokémon types#Normal-type|Normal]] |
||
|[[Pokémon types#Fire-type|Fire]] |
|[[Pokémon types#Fire-type|Fire]] |
||
| ⚫ | |||
|- |
|- |
||
| − | | |
+ | |type 2 |
| - |
| - |
||
|[[Pokémon types#Flying-type|Flying]] |
|[[Pokémon types#Flying-type|Flying]] |
||
| Line 279: | Line 360: | ||
|[[Pokémon types#Flying-type|Flying]] |
|[[Pokémon types#Flying-type|Flying]] |
||
| - |
| - |
||
| ⚫ | |||
|- |
|- |
||
|Morning |
|Morning |
||
| Line 288: | Line 368: | ||
|40% |
|40% |
||
|8% |
|8% |
||
| ⚫ | |||
|- |
|- |
||
|Day |
|Day |
||
| Line 297: | Line 376: | ||
|40% |
|40% |
||
|8% |
|8% |
||
| ⚫ | |||
|- |
|- |
||
|Night |
|Night |
||
| Line 306: | Line 384: | ||
|40% |
|40% |
||
|8% |
|8% |
||
| ⚫ | |||
|- |
|- |
||
|Level |
|Level |
||
| Line 316: | Line 393: | ||
|2 |
|2 |
||
|} |
|} |
||
| − | |||
==Tips== |
==Tips== |
||
| − | |||
There are many ledges in Sinnoh. Jump down to get to your destination fast! Take note that you can only jump from higher ground to lower ground. |
There are many ledges in Sinnoh. Jump down to get to your destination fast! Take note that you can only jump from higher ground to lower ground. |
||
| Line 325: | Line 400: | ||
=Sandgem Town= |
=Sandgem Town= |
||
| − | + | {{Main|Sandgem Town}} |
|
| ⚫ | Sandgem Town is a town found in Pokémon Diamond and Pearl. It is the second town you come to in the game. The first being [[Twinleaf Town]]. Sandgem Town has two houses, one of them being the character's other rival's house. It has the [[Pokémon Lab]] which is run by [[Professor Rowan]], a [[Pokemon Center]] and a [[Pokémart]]. This town will be very useful after you beat the Elite Four and get a National Dex. Once you get the National Dex you can go to the house directly below the [[Pokémon Center]]. This is the character's other rival's house. Talk to there little sister and she will tell you where a [[Pokémon Swarm]] is. |
||
| − | |||
| ⚫ | Sandgem Town is a town found in |
||
| − | |||
| ⚫ | |||
| ⚫ | |||
{|border="1" cellspacing="1" cellpadding="1" width="75%" |
{|border="1" cellspacing="1" cellpadding="1" width="75%" |
||
|style="background-color: #66B032; color:#000000;"|'''Item''' |
|style="background-color: #66B032; color:#000000;"|'''Item''' |
||
| Line 352: | Line 425: | ||
|Heals a paralyzed Pokémon. |
|Heals a paralyzed Pokémon. |
||
|} |
|} |
||
| − | |||
==Events== |
==Events== |
||
| − | |||
===Touring Sandgem Town=== |
===Touring Sandgem Town=== |
||
| ⚫ | Once you reach Sandgem Town, Prof. Rowan's kid will greet you and take you inside the lab. Just as you are going to enter the lab, your friend came out and hit you. Your friend will say that Prof. Rowan isn't as scary as he thought. He then sped off. Then head inside and talk to Prof. Rowan. Prof. Rowan will ask you to complete the encyclopedia [[Pokédex]] and if you refuse. He will reply "..." several times until you agrees. Prof. Rowan's kid will be holding a Pokémon that you and your friend did not choose. If you and your rival choose Turtwig and Chimchar, he/she will choose Piplup. |
||
| + | [[File:Diamond-Pearl Sandgem Town 1.png]] |
||
| ⚫ | Once you reach Sandgem Town, Prof. Rowan's kid will greet you and take you inside the lab. Just as you are going to enter the lab, your friend came out and hit you. Your friend will say that Prof. Rowan isn't as scary as he thought. He then sped off. Then head inside and talk to Prof. Rowan. Prof. Rowan will ask you to complete the |
||
| − | |||
| ⚫ | |||
Head outside the lab and the Prof. Rowan's kid will show you around the town. He/She will show you the Pokémon Center and the Pokémon Mart. Then she tell you to inform your Mum that you are going out for an adventure to complete the Pokédex. Then he/she will run away to Route 202. You must head back to [[Twinleaf Town]] to tell your Mum because the kid don't allow you to pass [[Route 202]]. |
Head outside the lab and the Prof. Rowan's kid will show you around the town. He/She will show you the Pokémon Center and the Pokémon Mart. Then she tell you to inform your Mum that you are going out for an adventure to complete the Pokédex. Then he/she will run away to Route 202. You must head back to [[Twinleaf Town]] to tell your Mum because the kid don't allow you to pass [[Route 202]]. |
||
| − | [[File:Diamond- |
+ | [[File:Diamond-Pearl Sandgem Town 2.png]] |
| − | Click [[ |
+ | Click [[Pokémon Diamond/Pearl Walkthrough (Part 1)#After Visiting Sandgem Town|here]] to continue the story. |
===Pokémon Swarm=== |
===Pokémon Swarm=== |
||
| ⚫ | Pokémon Swarm refers to a sudden group of Pokémon appearing at a location. If there is a Pokémon Swarm, the Prof. Rowan's kid's sister knows it. Head to Dawn/Lucas's house and ask her. She will tell you the Pokémon and the locations. You need to defeat the Elite Four first and get the National Pokédex. |
||
| + | [[File:Diamond-Pearl Sandgem Town 3.png]] |
||
| ⚫ | Pokémon Swarm refers to a sudden |
||
| − | |||
| ⚫ | |||
=Route 202= |
=Route 202= |
||
| − | + | {{Main|Route 202}} |
|
| − | |||
'''Route 202''' is north of [[Sandgem Town]] and south of [[Jubilife City]]. At this route, players will encounter their first battle against Trainers. |
'''Route 202''' is north of [[Sandgem Town]] and south of [[Jubilife City]]. At this route, players will encounter their first battle against Trainers. |
||
==Pokémon Appearances== |
==Pokémon Appearances== |
||
| − | |||
The higher the percentage, the higher the chance for the Pokémon to appear. |
The higher the percentage, the higher the chance for the Pokémon to appear. |
||
| Line 386: | Line 453: | ||
!colspan="8" style="background-color:#ADD8E6; color:#000000;"|Pokémon Diamond/Pearl |
!colspan="8" style="background-color:#ADD8E6; color:#000000;"|Pokémon Diamond/Pearl |
||
|- |
|- |
||
| − | !style="background-color:#ADD8E6; color:#000000;"|Location |
+ | !style="background-color:#ADD8E6; color:#000000;"|Location |
| − | !colspan="4" style="background-color:#ADD8E6; color:#000000;"|Grass |
+ | !colspan="4" style="background-color:#ADD8E6; color:#000000;"|Grass |
| − | !style="background-color:#ADD8E6; color:#000000;"|Swarm |
+ | !style="background-color:#ADD8E6; color:#000000;"|Swarm |
| − | !style="background-color:#ADD8E6; color:#000000;"|Pokémon Radar |
+ | !style="background-color:#ADD8E6; color:#000000;"|Pokémon Radar |
!style="background-color:#ADD8E6; color:#000000;"|FireRed |
!style="background-color:#ADD8E6; color:#000000;"|FireRed |
||
|- |
|- |
||
| Line 410: | Line 477: | ||
|[[Growlithe]] |
|[[Growlithe]] |
||
|- |
|- |
||
| − | | |
+ | |type 1 |
|[[Pokémon types#Normal-type|Normal]] |
|[[Pokémon types#Normal-type|Normal]] |
||
|[[Pokémon types#Normal-type|Normal]] |
|[[Pokémon types#Normal-type|Normal]] |
||
| Line 419: | Line 486: | ||
|[[Pokémon types#Fire-type|Fire]] |
|[[Pokémon types#Fire-type|Fire]] |
||
|- |
|- |
||
| − | | |
+ | |type 2 |
| - |
| - |
||
|[[Pokémon types#Flying-type|Flying]] |
|[[Pokémon types#Flying-type|Flying]] |
||
| Line 455: | Line 522: | ||
|8% |
|8% |
||
|} |
|} |
||
| − | |||
==Items== |
==Items== |
||
| − | |||
{|border="1" cellspacing="1" cellpadding="1" width="75%" |
{|border="1" cellspacing="1" cellpadding="1" width="75%" |
||
|style="background-color: #FB9902; color:#000000;"|'''Item''' |
|style="background-color: #FB9902; color:#000000;"|'''Item''' |
||
| Line 468: | Line 533: | ||
|Grass patch at northwest. |
|Grass patch at northwest. |
||
|} |
|} |
||
| − | |||
==Events== |
==Events== |
||
| − | |||
===Catching a Pokémon=== |
===Catching a Pokémon=== |
||
| ⚫ | |||
| + | [[File:Diamond-Pearl Route 202 1.png]] |
||
| ⚫ | |||
| − | |||
| ⚫ | |||
Read below to continue. |
Read below to continue. |
||
===First Trainer Encounter=== |
===First Trainer Encounter=== |
||
| − | |||
You will encounter your first trainer at Route 202. You can avoid those trainers, but it is best to battle them to earn precious experience and cash. |
You will encounter your first trainer at Route 202. You can avoid those trainers, but it is best to battle them to earn precious experience and cash. |
||
| − | To see the Trainers' information and their Pokémon at this route, click [[ |
+ | To see the Trainers' information and their Pokémon at this route, click [[Route 202#Trainers|here]]. |
| − | [[File:Diamond- |
+ | [[File:Diamond-Pearl Route 202 3.png]] |
Read below to continue. |
Read below to continue. |
||
==Tips== |
==Tips== |
||
| − | |||
Some Pokémon can be found in different time of the day. For example, on Route 202, [[Kricketot]] can only appeared in the morning and night. It does not appear in during the day. So if you want to catch the Kricketot, make sure you play during that time. You can also change the time on your Nintendo DS to catch it. |
Some Pokémon can be found in different time of the day. For example, on Route 202, [[Kricketot]] can only appeared in the morning and night. It does not appear in during the day. So if you want to catch the Kricketot, make sure you play during that time. You can also change the time on your Nintendo DS to catch it. |
||
| − | [[File:Diamond- |
+ | [[File:Diamond-Pearl Route 202 2.png]] |
| − | Click [[ |
+ | Click [[Pokémon Diamond/Pearl Walkthrough (Part 1)#Meet Your Friend|here]] to continue. |
=Jubilife City= |
=Jubilife City= |
||
| − | + | {{Main|Jubilife City}} |
|
| ⚫ | '''Jubilife City''' is a city in [[Sinnoh]]. It's the closest city to [[Twinleaf Town]] (the player's hometown). Features in the city include the [[GTS]], The [[Trainer School]], the headquarters of the [[Pokétch Company]], and the [[Jubilife TV]] Station. The city does not have a [[gym]]. To the west of the city is [[Canalave City]], to the east is [[Oreburgh City]], to the south is [[Sandgem Town]] and to the north is [[Floraroma Town]]. |
||
| − | |||
| ⚫ | '''Jubilife City''' is a city in [[Sinnoh]]. It's the closest city to [[Twinleaf Town]] (the player's hometown). Features in the city include the [[GTS]], The [[Trainer School]], the |
||
| − | |||
| ⚫ | |||
| ⚫ | |||
{|border="1" cellspacing="1" cellpadding="1" width="75%" |
{|border="1" cellspacing="1" cellpadding="1" width="75%" |
||
!colspan="5" style="background-color:#013220; color:#FFFFFF;"|Right Counter |
!colspan="5" style="background-color:#013220; color:#FFFFFF;"|Right Counter |
||
| Line 534: | Line 592: | ||
|style="background-color: #66B032; color:#000000;"|'''Descriptions''' |
|style="background-color: #66B032; color:#000000;"|'''Descriptions''' |
||
|- |
|- |
||
| − | |[[Air Mail]] |
+ | |[[Mail|Air Mail]] |
|50 |
|50 |
||
| - |
| - |
||
| Line 540: | Line 598: | ||
|[[Poké Ball#Heal Ball|Heal Ball]] |
|[[Poké Ball#Heal Ball|Heal Ball]] |
||
|300 |
|300 |
||
| − | |A remedial Poké Ball that restores the caught Pokémon's HP and eliminates any |
+ | |A remedial Poké Ball that restores the caught Pokémon's HP and eliminates any status problem. |
|} |
|} |
||
| − | |||
==Events== |
==Events== |
||
| − | |||
===Meet Your Friend=== |
===Meet Your Friend=== |
||
| ⚫ | |||
| − | |||
| ⚫ | |||
The first time you visit here, Dawn/Lucas will appear and talk to you that your friend is currently at the Pokémon Trainer School. Head towards there to pass him the Parcel his Mum have requested. There is a spare Town Map in his parcel and decided to gives you the extra. |
The first time you visit here, Dawn/Lucas will appear and talk to you that your friend is currently at the Pokémon Trainer School. Head towards there to pass him the Parcel his Mum have requested. There is a spare Town Map in his parcel and decided to gives you the extra. |
||
| − | [[File:Diamond- |
+ | [[File:Diamond-Pearl Jubilife City 2.png]] |
| − | Click [[ |
+ | Click [[Pokémon Diamond/Pearl Walkthrough (Part 1)#Get a Pokétch|here]] to continue. |
===Battle at Trainer School=== |
===Battle at Trainer School=== |
||
There are two trainers in the school are willing to battle with you. After you win both match, speak to the boy you battled earlier and he will give you TM10 [[Hidden Power]]. Information of their Pokémon is found [[Jubilife City#Trainers|here]]. |
There are two trainers in the school are willing to battle with you. After you win both match, speak to the boy you battled earlier and he will give you TM10 [[Hidden Power]]. Information of their Pokémon is found [[Jubilife City#Trainers|here]]. |
||
| − | [[File:Diamond- |
+ | [[File:Diamond-Pearl Jubilife City 10.png]] |
===Get a Pokétch=== |
===Get a Pokétch=== |
||
| ⚫ | |||
| − | |||
| − | [[File:Diamond- |
+ | [[File:Diamond-Pearl Jubilife City 6.png|right|frame]] |
| ⚫ | |||
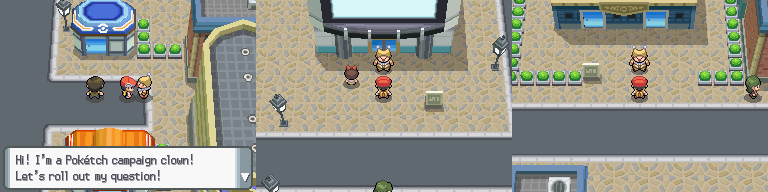
After you talked to your friend, head outside and head north. A man will talked to you. He is the President of the Pokétch company and will tell you to look for three clowns. The clowns locations are: In front of the PokéMart, in front of the Jubilife TV Station and in front of the Pokétch Company. Answer correctly their questions and they will give you a Coupon. Collect 3 Coupons and meet the President again. He will give you the [[Pokétch]]. It is a very useful device, allowing you to keep track of time or finding hidden items. |
After you talked to your friend, head outside and head north. A man will talked to you. He is the President of the Pokétch company and will tell you to look for three clowns. The clowns locations are: In front of the PokéMart, in front of the Jubilife TV Station and in front of the Pokétch Company. Answer correctly their questions and they will give you a Coupon. Collect 3 Coupons and meet the President again. He will give you the [[Pokétch]]. It is a very useful device, allowing you to keep track of time or finding hidden items. |
||
| − | [[File:Diamond- |
+ | [[File:Diamond-Pearl Jubilife City 4.png]] |
| − | Click [[ |
+ | Click [[Pokémon Diamond/Pearl Walkthrough (Part 2)#Rival_Battle_.231|here]] to continue. |
===Get an Old Rod=== |
===Get an Old Rod=== |
||
| − | |||
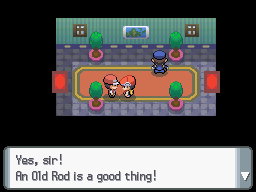
Head west of Jubilife City and into a building. Talk to the fisherman there and he will give you an [[Old Rod]] if you replied "Yes". |
Head west of Jubilife City and into a building. Talk to the fisherman there and he will give you an [[Old Rod]] if you replied "Yes". |
||
| − | [[File:Diamond- |
+ | [[File:Diamond-Pearl Jubilife City 5.png]] |
===Get a Quick Claw=== |
===Get a Quick Claw=== |
||
| − | |||
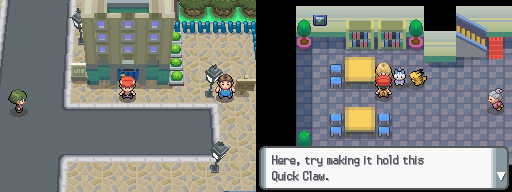
Head to a condominium and chat with the woman there. She will give you a Quick Claw, a Held item that allows your Pokémon to attack first. |
Head to a condominium and chat with the woman there. She will give you a Quick Claw, a Held item that allows your Pokémon to attack first. |
||
| − | [[File:Diamond- |
+ | [[File:Diamond-Pearl Jubilife City 9.png]] |
===First Encounter with the Team Galactic Grunts=== |
===First Encounter with the Team Galactic Grunts=== |
||
| − | |||
Soon after you win yourself a badge, two strange person appear at the northern entrance of [[Jubilife City]], found talking to Professor Rowan and his grandkid. Those are the Team Galactics, and they don't look friendly. Apparently, they wanted something from the professor. This doesn't sounds good, so together with Dawn/Lucas, battle with them. This will be your first tag battle with another partner. |
Soon after you win yourself a badge, two strange person appear at the northern entrance of [[Jubilife City]], found talking to Professor Rowan and his grandkid. Those are the Team Galactics, and they don't look friendly. Apparently, they wanted something from the professor. This doesn't sounds good, so together with Dawn/Lucas, battle with them. This will be your first tag battle with another partner. |
||
| − | [[File:Diamond- |
+ | [[File:Diamond-Pearl Jubilife City 11.png]] |
{|border="1" style="text-align:center;" |
{|border="1" style="text-align:center;" |
||
!colspan="2" style="background-color:#FFFF00; color:#000000;"|Galactic Grunts |
!colspan="2" style="background-color:#FFFF00; color:#000000;"|Galactic Grunts |
||
|- |
|- |
||
| − | |[[File:Wurmple.png]] |
+ | |[[File:Wurmple(DPP)Sprite.png]] |
|[[File:PlatinumZubat(M).png]] |
|[[File:PlatinumZubat(M).png]] |
||
|- |
|- |
||
| Line 608: | Line 659: | ||
!colspan="2" style="background-color:#FFFFFF; color:#000000;"|Money: 720 |
!colspan="2" style="background-color:#FFFFFF; color:#000000;"|Money: 720 |
||
|} |
|} |
||
| − | |||
---- |
---- |
||
| − | |||
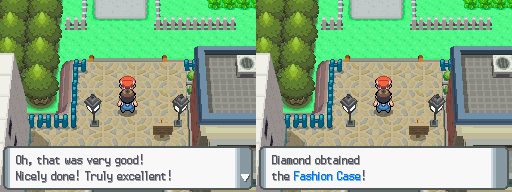
After winning the battle, Team Galactic retreats and Professor Rowan and his grandkid will tell you that 90% of the Pokémon is tied with evolution. Then they walked off. A man then walks towards you. He is a representative from the Jublife TV. He will give you a [[Fashion Case]] that allows you to dress up your Pokémon. After this battle, you can now access to the [[Jubilife City#Jubilife TV Station|Jubilife TV Station]]! |
After winning the battle, Team Galactic retreats and Professor Rowan and his grandkid will tell you that 90% of the Pokémon is tied with evolution. Then they walked off. A man then walks towards you. He is a representative from the Jublife TV. He will give you a [[Fashion Case]] that allows you to dress up your Pokémon. After this battle, you can now access to the [[Jubilife City#Jubilife TV Station|Jubilife TV Station]]! |
||
| − | [[File:Diamond- |
+ | [[File:Diamond-Pearl Jubilife City 12.png]] |
| − | *Now, head to [[ |
+ | *Now, head to [[Pokémon Diamond/Pearl Walkthrough (Part 2)#The Ravaged Path|here]] and continue the story. |
'''For information on [[GTS]] (Global Trade System), [[Pokétch Company]], and [[Jubilife City#Jubilife TV Station|Jubilife TV Station]], please refer to the main article, [[Jubilife City]].''' |
'''For information on [[GTS]] (Global Trade System), [[Pokétch Company]], and [[Jubilife City#Jubilife TV Station|Jubilife TV Station]], please refer to the main article, [[Jubilife City]].''' |
||
Click [[Pokémon Diamond/Pearl Walkthrough (Part 2)|here]] for Part 2 of the walkthrough. |
Click [[Pokémon Diamond/Pearl Walkthrough (Part 2)|here]] for Part 2 of the walkthrough. |
||
| + | [[Category:Pokémon Diamond/Pearl Walkthroughs]] |
||
Revision as of 01:06, 30 November 2014
This is part of the Pokémon Diamond/Pearl Walkthrough, with the following locations: Twinleaf Town, Verity Lakefront, Lake Verity, Route 201 and Sandgem Town.
Click here for Part 2.
Twinleaf Town
In Pokémon Diamond and Pearl and Pokémon Platinum, Twinleaf Town is the character's home town. This is the first time that there is not a Pokémon Lab in the starting town. It has four houses, the house in the bottom right hand corner is the character's house. The house in the upper left hand corner is the character's rival's house. Twinleaf Town also has a small lake at the very bottom.
Pokémon Appearances
| All Versions | ||||
|---|---|---|---|---|
| Pokémon | Morning | Day | Night | Method |
| Magikarp | 100% | 100% | 100% | Old Rod |
| Goldeen | 35% | 35% | 35% | Good Rod |
| Magikarp | 65% | 65% | 65% | Good Rod |
| Gyarados | 65% | 65% | 65% | Super Rod |
| Seaking | 35% | 35% | 35% | Super Rod |
| Psyduck | 10% | 10% | 10% | Surf |
| Golduck | 10% | 10% | 10% | Surf |
Events
The Beginning
 You have just watched the episode of the Red Gyarados. Then head downstairs and your Mom will tell you that your friend is looking for you. She also warns you not to go into the tall grass. Then head outside and go to your friend's house at north-west.
Meet Your Buddy
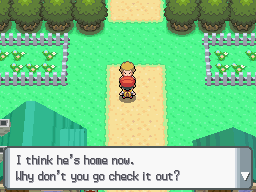
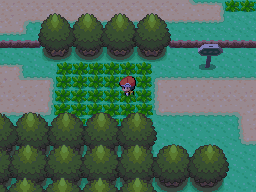
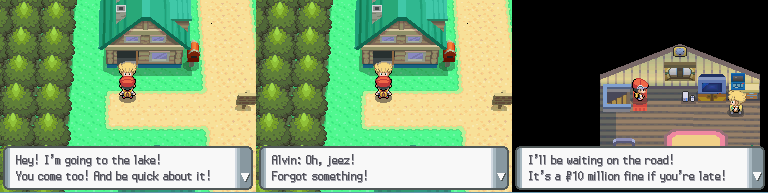 Head to your friend house located at northwest of Twinleaf Town. When you reach the entrance, your friend will knock into you. Then he went off and came back again to take the things he forgotten. You enter the house and go upstairs, and you will see him packing his things. He will then run downstairs again. Meet him at Route 201.
Then walk to the left of the Route 201 and enter Lake Verity.
Note: You must meet your friend in order to access Route 201.
After Battle
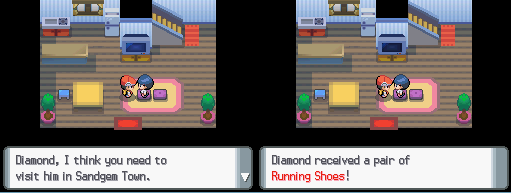 After the Pokémon battle and meeting Professor Rowan and his grandchild, you will return home. Your mother tell you to meet Professor Rowan at Sandgem Town and gives you a Running Shoes. Now head to Route 201 and began your journey to Sandgem Town!
Click here to view Route 201.
Click here to continue the story.
After Visiting Sandgem Town
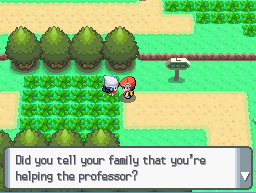
Head home to tell your Mum about the big quest you are going to do. Your Mum will then gives you a Journal. Then your friend's Mum will enter. She will gives you a Parcel that your friend forgotten to take. Head to Jubilife City to pass him the Parcel.
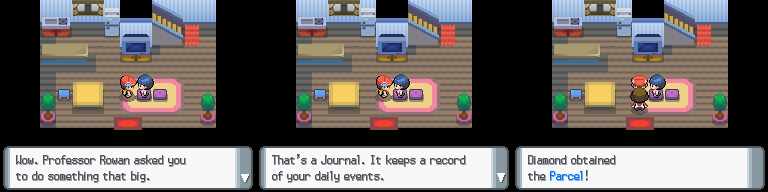
Click here to continue to Route 202.
Lake Verity
A lake located near Twinleaf Town. It's main inhabitant is the legendary Pokémon Mesprit. It also has Starly, Bidoof and Golduck living in the area.
Events
First Pokémon Battle
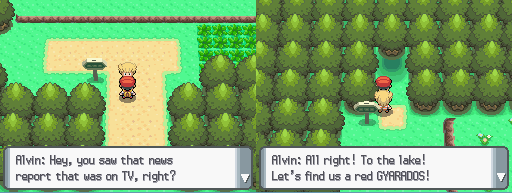
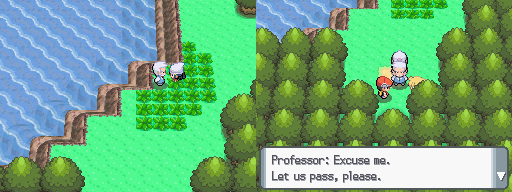 When you arrive Lake Verity, you will see an old man and his grandkid. That's Professor Rowan and his kid (Dawn if you are a boy, Lucas if you are a girl). They will then exit the Lake Verity.
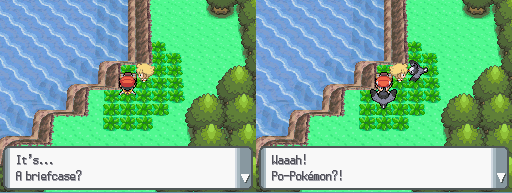
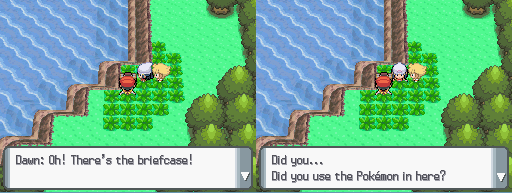
The professor had left his briefcase on the grass patch and your friend decided to check it out. As you are looking through the briefcase, two Starlys fly from the surroundings and attack both of you and your friends. Frantically, you decided to open the briefcase and use the Pokémon inside. There are three Pokémon. They are the Grass-type Turtwig, Fire-type Chimchar and Water-type Piplup. Choose one of them carefully because it will stay with you for the rest of the journey.
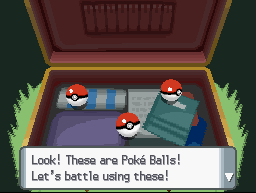

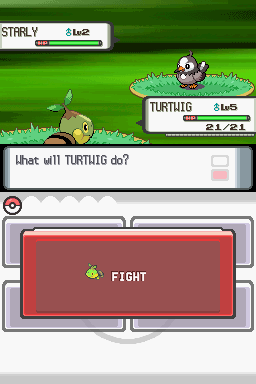
Once you choose your Pokémon, you will then battle with the wild Starly. Tap "Fight" on the tap screen of your Nintendo DS to fight it. Choose the attack and defeat the Starly. This will be your first Pokémon battle. After you defeat it, your rival will comment about the fight. If you use Turtwig, he will use Chimchar. If you choose Chimchar, he will use Piplup. If you take Piplup, he will use Turtwig.
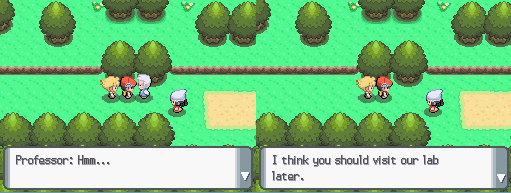
The kid earlier went back to retrieve the briefcase, and finds out that you and your friend have taken the Pokémon from the briefcase. The kid then takes the briefcase and runs away from Lake Verity. Go to Verity Lakefront and chat with the Professor Rowan. The professor will just look at the Pokémon, then walk away. His kid will tell you to visit the lab in Sandgem Town. You will then return home.
See Twinleaf Town to continue the story.
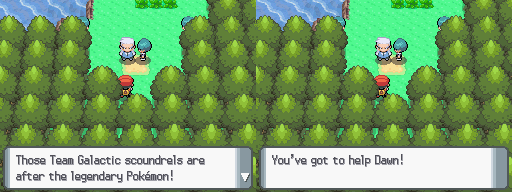
Trouble at Lake Verity
Get here as soon as you defeat Saturn in Lake Valor. You will see Prof. Rowan and asked you to help his grandchild. Defeat the Galactic Grunts on the way.
| 1st Group Galacitc Grunts | |||
|---|---|---|---|
| Female Grunt | Male Grunt | ||
| File:PlatinumGlameow.png | File:Silcoon(DPP)Sprite.png | File:DiamondPearlGolbatMale.png | File:PlatinumGlameow.png |
| Glameow ♀ | Silcoon ♀ | Golbat ♀ | Glameow ♀ |
| Lv. 33 | Lv. 32 | Lv. 32 | Lv. 32 |
| Normal | Bug | Poison | Normal |
| - | - | Flying | - |
| Money: 2600 | |||
| 2nd Group Galactic Grunts | |||
| Left | Right | ||
| File:DiamondPearlStunky(M).png | File:PlatinumGlameow.png | File:Beautifly(DPP)SpriteMale.png | File:PlatinumGlameow.png |
| Stunky ♂ | Glameow ♀ | Beautifly ♀ | Glameow ♀ |
| Lv. 32 | Lv. 32 | Lv. 31 | Lv. 33 |
| Poison | Normal | Bug | Normal |
| Dark | - | Flying | - |
| Money: 1280 | Money: 1320 | ||
Sprite.png)
.png)
SpriteMale.png)
You will meet Mars talking to Dawn/Lucas. Now, head to Mars and battle with her the second time.
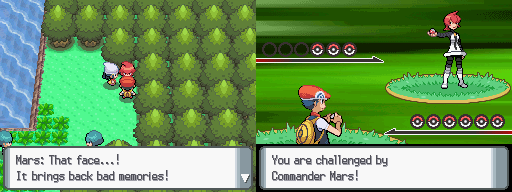
| Commander Mars | ||
|---|---|---|
| File:DiamondPearlGolbatMale.png | File:Bronzor(DP)Sprite.png | File:PlatinumPurugly.png |
| Golbat ♀ | Bronzor | Purugly ♀ |
| Lv. 37 | Lv. 37 | Lv. 39 |
| Poison | Steel | Normal |
| Flying | Psychic | - |
| Money: 3120 | ||
Sprite.png)
After the battle, she will say that Mesprit, living in this lake, have gone off to help its friend, Azelf, which is captured by Saturn earlier on at Lake Valor, which make them easier to catch. After that, she left the lake.

Prof. Rowan then talked to you and worried about your rival at Lake Acuity. That's your next destination.
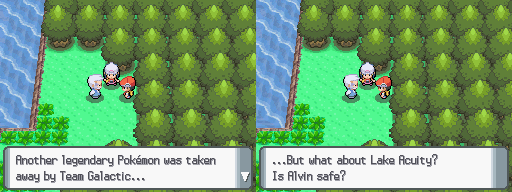
Fly to Celestic Town now and go to Route 211 at the left. Enter Mt. Coronet. Head north directly and push the boulder using Strength. After that, head north all the way, then turn left to go below the stairs.
After the stairs, go to the north all the way till you see a stair. Climb up the stairs and go another short route to reach the northern exit of Mt. Coronet to Route 216. Click here when you reach that route.
Catching Mesprit
After you deal with the Team Galactic at the Spear Pillar, head back to this place again if you want a legendary Pokémon in your party. This place lies a cave with a strange Psychic Pokémon - Mesprit. If you have a Pokémon that knows Surf, surf the lake and head to the centre of the lake. Enter the cave there and you will find face to face with Mesprit.
However, once you interact with Mesprit, it will fly away. So you have to find the legendary Pokémon around the Sinnoh grasses, which appear randomly on grassy routes. If you manage to track it, make sure you weaken it. It is OK for it to run away at first, because you can now refer to the map on your Pokétech to found out where Mesprit have gone. Every time you enter a cave, building or going across routes, Mesprit will be found at a different place. So meeting Mesprit is depended on luck.
But if you figured out its pattern, find it and track it down. Also, make sure your Pokémon can cast a Sleeping or Paralyzed move, so that Mesprit may not be able to escape easily. Golbat with the move Mean Look is a good choice, or Trapinch with the ability Arena Trap. Mesprit will retained the HP you weaken it, so you have to meet it several times before it is finally captured.
Stock a lot of Ultra Ball, Timer Ball or Quick Ball. Once you meet it, throw it with a Quick Ball. If it does not work on the first try, and its HP is about halfway or slightly lesser, throw a Ultra Ball. If you managed to keep it from escaping, use Timer Ball to increase its capture rate.
If you are patient enough, Mesprit will be truly yours, and fill up the Pokédex.
Route 201
Route 201 is located at the north of Twinleaf Town, west of Sandgem Town and east of Verity Lakefront. You can battle the Pokémon the first time but cannot catch it.
Pokémon Appearances
The higher the percentage, the higher the chance that the Pokémon to appear.
| Pokémon Diamond | |||||||
|---|---|---|---|---|---|---|---|
| Location | Grass | Pokémon Radar | Swarm | FireRed | |||
| Sprites | File:DiamondPearlBidoof(M).png | File:DiamondPearlStarly(M).png | File:DiamondPearlNidoran(M).png | File:DiamondPearlNidoran(F).png | File:DiamondPearlDoduo(M).png | File:DiamondPearlGrowlithe.png | |
| Pokémon | Bidoof | Starly | Nidoran♂ | Nidoran♀ | Doduo | Growlithe | |
| type 1 | Normal | Normal | Poison | Poison | Normal | Fire | |
| type 2 | - | Flying | - | - | Flying | - | |
| Morning | 50% | 50% | 20% | 2% | 40% | 8% | |
| Day | 50% | 50% | 20% | 2% | 40% | 8% | |
| Night | 60% | 40% | 20% | 2% | 40% | 8% | |
| Level | 2 - 3 | 2 - 3 | 2 | 3 | 2 | 2 | |
| Pokémon Pearl | |||||||
| Location | Grass | Pokémon Radar | Swarm | FireRed | |||
| Sprites | File:DiamondPearlBidoof(M).png | File:DiamondPearlStarly(M).png | File:DiamondPearlNidoran(M).png | File:DiamondPearlNidoran(F).png | File:DiamondPearlDoduo(M).png | File:DiamondPearlGrowlithe.png | |
| Pokémon | Bidoof | Starly | Nidoran♂ | Nidoran♀ | Doduo | Growlithe | |
| type 1 | Normal | Normal | Poison | Poison | Normal | Fire | |
| type 2 | - | Flying | - | - | Flying | - | |
| Morning | 50% | 50% | 2% | 20% | 40% | 8% | |
| Day | 50% | 50% | 2% | 20% | 40% | 8% | |
| Night | 60% | 40% | 2% | 20% | 40% | 8% | |
| Level | 2 - 3 | 2 - 3 | 3 | 2 | 2 | 2 | |
.png)
.png)
.png)
.png)
.png)
Tips
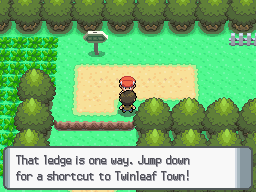
There are many ledges in Sinnoh. Jump down to get to your destination fast! Take note that you can only jump from higher ground to lower ground.
Sandgem Town
Sandgem Town is a town found in Pokémon Diamond and Pearl. It is the second town you come to in the game. The first being Twinleaf Town. Sandgem Town has two houses, one of them being the character's other rival's house. It has the Pokémon Lab which is run by Professor Rowan, a Pokemon Center and a Pokémart. This town will be very useful after you beat the Elite Four and get a National Dex. Once you get the National Dex you can go to the house directly below the Pokémon Center. This is the character's other rival's house. Talk to there little sister and she will tell you where a Pokémon Swarm is.
PokéMart Merchandise
| Item | Price | Descriptions |
| Poké Ball | 200 | A tool to catch Pokémon. |
| Potion | 300 | Restores HP of Pokémon by 20 points. |
| Antidote | 100 | Heals a poisoned Pokémon. |
| Parlyz Heal | 200 | Heals a paralyzed Pokémon. |
Events
Touring Sandgem Town
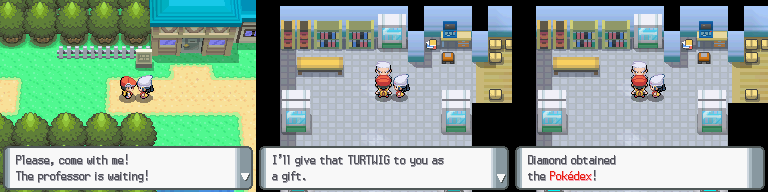
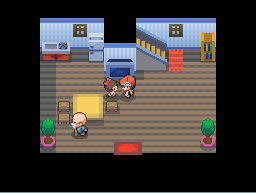
Once you reach Sandgem Town, Prof. Rowan's kid will greet you and take you inside the lab. Just as you are going to enter the lab, your friend came out and hit you. Your friend will say that Prof. Rowan isn't as scary as he thought. He then sped off. Then head inside and talk to Prof. Rowan. Prof. Rowan will ask you to complete the encyclopedia Pokédex and if you refuse. He will reply "..." several times until you agrees. Prof. Rowan's kid will be holding a Pokémon that you and your friend did not choose. If you and your rival choose Turtwig and Chimchar, he/she will choose Piplup.
Head outside the lab and the Prof. Rowan's kid will show you around the town. He/She will show you the Pokémon Center and the Pokémon Mart. Then she tell you to inform your Mum that you are going out for an adventure to complete the Pokédex. Then he/she will run away to Route 202. You must head back to Twinleaf Town to tell your Mum because the kid don't allow you to pass Route 202.
Click here to continue the story.
Pokémon Swarm
Pokémon Swarm refers to a sudden group of Pokémon appearing at a location. If there is a Pokémon Swarm, the Prof. Rowan's kid's sister knows it. Head to Dawn/Lucas's house and ask her. She will tell you the Pokémon and the locations. You need to defeat the Elite Four first and get the National Pokédex.
Route 202
Route 202 is north of Sandgem Town and south of Jubilife City. At this route, players will encounter their first battle against Trainers.
Pokémon Appearances
The higher the percentage, the higher the chance for the Pokémon to appear.
| Pokémon Diamond/Pearl | |||||||
|---|---|---|---|---|---|---|---|
| Location | Grass | Swarm | Pokémon Radar | FireRed | |||
| Sprites | File:DiamondPearlBidoof(M).png | File:DiamondPearlStarly(M).png | File:Shinx.png | File:DiamondPearlKricketot(M).png | File:DiamondPearlZigzagoon.png | File:DiamondPearlSentret.png | File:DiamondPearlGrowlithe.png |
| Pokémon | Bidoof | Starly | Shinx | Kricketot | Zigzagoon | Sentret | Growlithe |
| type 1 | Normal | Normal | Electric | Bug | Normal | Normal | Fire |
| type 2 | - | Flying | - | - | - | - | - |
| Morning | 30% | 30% | 30% | 10% | 40% | 22% | 8% |
| Day | 30% | 40% | 30% | - | 40% | 22% | 8% |
| Night | 30% | 20% | 30% | 20% | 40% | 22% | 8% |
.png)
Items
| Item | Amount | Location |
| Potion | 1 | Grass patch at northwest. |
Events
Catching a Pokémon
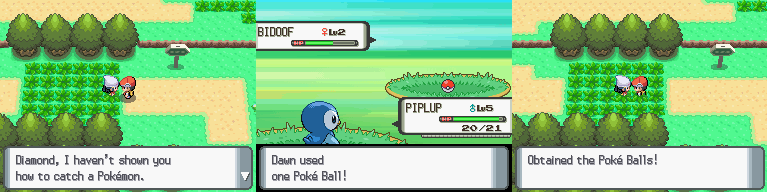
After you told your Mum about your adventure, head to Route 202 and Dawn/Lucas will teach you how to catch a Pokémon. After that, he/she will give you 5 Poké Balls for free. You can now catch your favorite Pokémon and start collecting it to make a strong team!
Read below to continue.
First Trainer Encounter
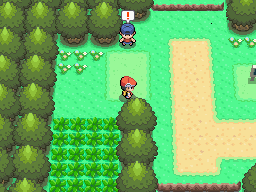
You will encounter your first trainer at Route 202. You can avoid those trainers, but it is best to battle them to earn precious experience and cash.
To see the Trainers' information and their Pokémon at this route, click here.
Read below to continue.
Tips
Some Pokémon can be found in different time of the day. For example, on Route 202, Kricketot can only appeared in the morning and night. It does not appear in during the day. So if you want to catch the Kricketot, make sure you play during that time. You can also change the time on your Nintendo DS to catch it.
Click here to continue.
Jubilife City
Jubilife City is a city in Sinnoh. It's the closest city to Twinleaf Town (the player's hometown). Features in the city include the GTS, The Trainer School, the headquarters of the Pokétch Company, and the Jubilife TV Station. The city does not have a gym. To the west of the city is Canalave City, to the east is Oreburgh City, to the south is Sandgem Town and to the north is Floraroma Town.
PokéMart Merchandise
| Right Counter | ||||
|---|---|---|---|---|
| Item | Price | Descriptions | ||
| Poké Ball | 200 | A tool to catch Pokémon. | ||
| Potion | 300 | Restores HP of Pokémon by 20 points. | ||
| Antidote | 100 | Heals a poisoned Pokémon. | ||
| Parlyz Heal | 200 | Heals a paralyzed Pokémon. | ||
| Left Counter | ||||
| Item | Price | Descriptions | ||
| Air Mail | 50 | - | ||
| Heal Ball | 300 | A remedial Poké Ball that restores the caught Pokémon's HP and eliminates any status problem. | ||
Events
Meet Your Friend

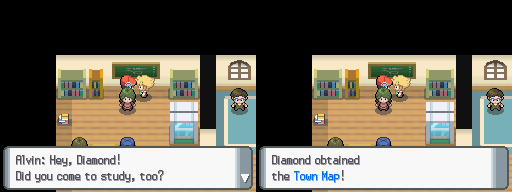
The first time you visit here, Dawn/Lucas will appear and talk to you that your friend is currently at the Pokémon Trainer School. Head towards there to pass him the Parcel his Mum have requested. There is a spare Town Map in his parcel and decided to gives you the extra.
Click here to continue.
Battle at Trainer School
There are two trainers in the school are willing to battle with you. After you win both match, speak to the boy you battled earlier and he will give you TM10 Hidden Power. Information of their Pokémon is found here.

Get a Pokétch
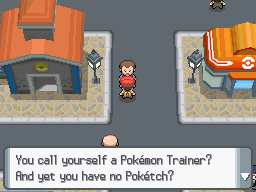
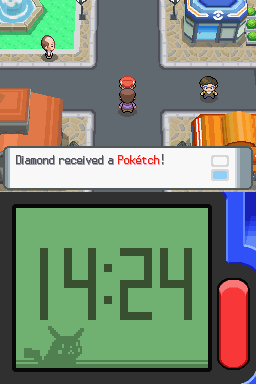
After you talked to your friend, head outside and head north. A man will talked to you. He is the President of the Pokétch company and will tell you to look for three clowns. The clowns locations are: In front of the PokéMart, in front of the Jubilife TV Station and in front of the Pokétch Company. Answer correctly their questions and they will give you a Coupon. Collect 3 Coupons and meet the President again. He will give you the Pokétch. It is a very useful device, allowing you to keep track of time or finding hidden items.
Click here to continue.
Get an Old Rod
Head west of Jubilife City and into a building. Talk to the fisherman there and he will give you an Old Rod if you replied "Yes".
Get a Quick Claw
Head to a condominium and chat with the woman there. She will give you a Quick Claw, a Held item that allows your Pokémon to attack first.
First Encounter with the Team Galactic Grunts
Soon after you win yourself a badge, two strange person appear at the northern entrance of Jubilife City, found talking to Professor Rowan and his grandkid. Those are the Team Galactics, and they don't look friendly. Apparently, they wanted something from the professor. This doesn't sounds good, so together with Dawn/Lucas, battle with them. This will be your first tag battle with another partner.

| Galactic Grunts | |
|---|---|
| File:Wurmple(DPP)Sprite.png | File:PlatinumZubat(M).png |
| Wurmple ♂ | Zubat ♂ |
| Lv. 9 | Lv. 9 |
| Bug | Poison |
| - | Flying |
| Money: 720 | |
Sprite.png)
.png)
After winning the battle, Team Galactic retreats and Professor Rowan and his grandkid will tell you that 90% of the Pokémon is tied with evolution. Then they walked off. A man then walks towards you. He is a representative from the Jublife TV. He will give you a Fashion Case that allows you to dress up your Pokémon. After this battle, you can now access to the Jubilife TV Station!
- Now, head to here and continue the story.
For information on GTS (Global Trade System), Pokétch Company, and Jubilife TV Station, please refer to the main article, Jubilife City.
Click here for Part 2 of the walkthrough.