No edit summary |
No edit summary |
||
| Line 1: | Line 1: | ||
{{PoI |
{{PoI |
||
|name = Battle Frontier |
|name = Battle Frontier |
||
| − | |image = |
+ | |image = Battle Frontier III.png|250px]] |
|japanese = バトルフロンティア |
|japanese = バトルフロンティア |
||
|romaji = Battle Frontier |
|romaji = Battle Frontier |
||
| Line 16: | Line 16: | ||
==Appearances in the games== |
==Appearances in the games== |
||
| − | [[File:Battle Frontier III.png|thumb|300px|The Battle Frontier]] |
||
In the game ''Pokémon Emerald'', you are asked to enter one of two categories: Level 50 or 'Open Level'. In Level 50, you can enter [[Pokémon]] between level 5 and 50. All of your opponents' [[Pokémon]] will be exactly level 50. In Open Level, you can enter level 50-100, however it is safer to enter in level 60-100, for none of your opponents will have less than level 60 [[Pokémon]]. In the game, the facilities each have a '''"Frontier Brain"''' protecting the facility. Each of the Frontier Brains has a '''Symbol''', which you have to obtain by defeating them in a battle. |
In the game ''Pokémon Emerald'', you are asked to enter one of two categories: Level 50 or 'Open Level'. In Level 50, you can enter [[Pokémon]] between level 5 and 50. All of your opponents' [[Pokémon]] will be exactly level 50. In Open Level, you can enter level 50-100, however it is safer to enter in level 60-100, for none of your opponents will have less than level 60 [[Pokémon]]. In the game, the facilities each have a '''"Frontier Brain"''' protecting the facility. Each of the Frontier Brains has a '''Symbol''', which you have to obtain by defeating them in a battle. |
||
| Line 25: | Line 24: | ||
! colspan="1" style="background-color:silver; color:black;" | Frontier Brains |
! colspan="1" style="background-color:silver; color:black;" | Frontier Brains |
||
! colspan="2" style="background-color:silver; color:black;" | Facility |
! colspan="2" style="background-color:silver; color:black;" | Facility |
||
| + | ! colspan="1" style="background-color:silver; color:black;" | Pokémon |
||
! colspan="1" style="background-color:silver; color:black;" | Symbol |
! colspan="1" style="background-color:silver; color:black;" | Symbol |
||
|- |
|- |
||
| [[File:Anabel(E)Sprite.png]]<br />[[Salon Maiden Anabel]] |
| [[File:Anabel(E)Sprite.png]]<br />[[Salon Maiden Anabel]] |
||
| colspan="2" | [[Battle Tower]] |
| colspan="2" | [[Battle Tower]] |
||
| + | | '''First Battle:''' <br /> [[File:065.png]] [[File:143.png]] [[File:244.png]] <br /> '''Second Battle:''' <br /> [[File:143.png]] [[File:243.png]] [[File:381.png]] |
||
| [[File:AbilitySSilver.png]] [[File:AbilitySGold.png]]<br />[[Symbol#Ability Symbol|Ability Symbol]] |
| [[File:AbilitySSilver.png]] [[File:AbilitySGold.png]]<br />[[Symbol#Ability Symbol|Ability Symbol]] |
||
|- |
|- |
||
| [[File:Spenser(E)Sprite.png]]<br />[[Palace Maven Spenser]] |
| [[File:Spenser(E)Sprite.png]]<br />[[Palace Maven Spenser]] |
||
| colspan="2" | [[Battle Palace]] |
| colspan="2" | [[Battle Palace]] |
||
| + | | '''First Battle:''' <br /> [[File:169.png]] [[File:131.png]] [[File:289.png]] <br /> '''Second Battle:''' <br /> [[File:059.png]] [[File:245.png]] [[File:289.png]] |
||
| [[File:SpiritSSilver.png]] [[File:SpiritSGold.png]]<br />[[Symbol#Spirit Symbol|Spirit Symbol]] |
| [[File:SpiritSSilver.png]] [[File:SpiritSGold.png]]<br />[[Symbol#Spirit Symbol|Spirit Symbol]] |
||
|- |
|- |
||
| [[File:Noland(E)Sprite.png]]<br />[[Factory Head Noland]] |
| [[File:Noland(E)Sprite.png]]<br />[[Factory Head Noland]] |
||
| colspan="2" | [[Battle Factory]] |
| colspan="2" | [[Battle Factory]] |
||
| + | | '''First Battle:''' <br /> Random <br /> '''Second Battle:''' <br /> Random |
||
| [[File:KnowledgeSSilver.png]] [[File:KnowledgeSGold.png]]<br />[[Symbol#Knowledge Symbol|Knowledge Symbol]] |
| [[File:KnowledgeSSilver.png]] [[File:KnowledgeSGold.png]]<br />[[Symbol#Knowledge Symbol|Knowledge Symbol]] |
||
|- |
|- |
||
| [[File:Brandon(E)Sprite.png]]<br />[[Pyramid King Brandon]] |
| [[File:Brandon(E)Sprite.png]]<br />[[Pyramid King Brandon]] |
||
| colspan="2" | [[Battle Pyramid]] |
| colspan="2" | [[Battle Pyramid]] |
||
| + | | '''First Battl:''' <br /> [[File:377.png]] [[File:378.png]] [[File:379.png]] <br /> '''Second Battle:''' <br /> |
||
| [[File:BraveSSilver.png]] [[File:BraveSGold.png]]<br />[[Symbol#Brave Symbol|Brave Symbol]] |
| [[File:BraveSSilver.png]] [[File:BraveSGold.png]]<br />[[Symbol#Brave Symbol|Brave Symbol]] |
||
|- |
|- |
||
| [[File:Tucker(E)Sprite.png]]<br />[[Dome Ace Tucker]] |
| [[File:Tucker(E)Sprite.png]]<br />[[Dome Ace Tucker]] |
||
| colspan="2" | [[Battle Dome]] |
| colspan="2" | [[Battle Dome]] |
||
| + | | '''First Battle:''' <br /> '''Second Battle:''' <br /> |
||
| [[File:TacticsSSilver.png]] [[File:TacticsSGold.png]]<br />[[Symbol#Tactics Symbol|Tactics Symbol]] |
| [[File:TacticsSSilver.png]] [[File:TacticsSGold.png]]<br />[[Symbol#Tactics Symbol|Tactics Symbol]] |
||
|- |
|- |
||
| [[File:Greta(E)Sprite.png]]<br />[[Arena Tycoon Greta]] |
| [[File:Greta(E)Sprite.png]]<br />[[Arena Tycoon Greta]] |
||
| colspan="2" | [[Battle Arena]] |
| colspan="2" | [[Battle Arena]] |
||
| + | | '''First Battle:''' <br /> '''Second Battle:''' <br /> |
||
| [[File:GutsSSilver.png]] [[File:GutsSGold.png]]<br />[[Symbol#Guts Symbol|Guts Symbol]] |
| [[File:GutsSSilver.png]] [[File:GutsSGold.png]]<br />[[Symbol#Guts Symbol|Guts Symbol]] |
||
|- |
|- |
||
| [[File:Lucy(E)Sprite.png]]<br />[[Pike Queen Lucy]] |
| [[File:Lucy(E)Sprite.png]]<br />[[Pike Queen Lucy]] |
||
| colspan="2" | [[Battle Pike]] |
| colspan="2" | [[Battle Pike]] |
||
| + | | '''First battle:''' <br /> '''Second Battle:''' |
||
| [[File:LuckSSIlver.png]] [[File:LuckSGold.png]]<br />[[Symbol#Luck Symbol|Luck Symbol]] |
| [[File:LuckSSIlver.png]] [[File:LuckSGold.png]]<br />[[Symbol#Luck Symbol|Luck Symbol]] |
||
|} |
|} |
||
Revision as of 20:20, 9 January 2014
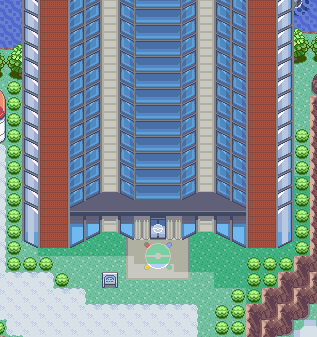
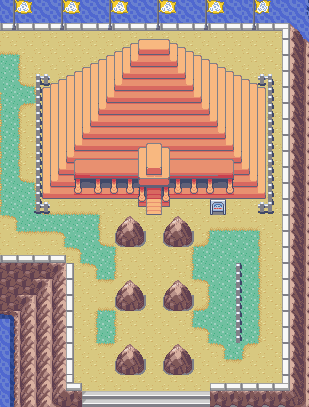
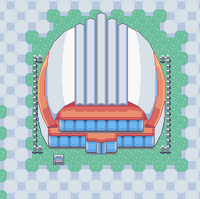
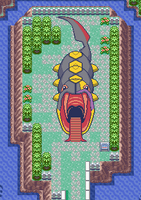
The Battle Frontier (Japanese: バトルフロンティア Battle Frontier) is an area introduced in Generation III, and only accessible in Pokémon Emerald. This area features seven different "Facilities" where the player can take part in Pokémon battles against Trainers and Frontier Brains. The Battle Frontier was founded by Scott in order to accomplish his dream of making the toughest challenges for Trainers as well as finding Trainers that can beat them. In Pokémon Emerald, the Battle Frontier is only accessed if the player has defeated the regional Elite Four. After beating the Elite Four, the player can get to the Battle Frontier via the S.S Tidal.
This Battle Frontier also appears in the Anime series, but with several notable changes. The most apparent of changes is that instead of the facilities being in a single location, in the Hoenn region, they are instead scattered around the Kanto region. It is larger than the Sinnoh battle frontier because it has more facilities.
Appearances in the games
In the game Pokémon Emerald, you are asked to enter one of two categories: Level 50 or 'Open Level'. In Level 50, you can enter Pokémon between level 5 and 50. All of your opponents' Pokémon will be exactly level 50. In Open Level, you can enter level 50-100, however it is safer to enter in level 60-100, for none of your opponents will have less than level 60 Pokémon. In the game, the facilities each have a "Frontier Brain" protecting the facility. Each of the Frontier Brains has a Symbol, which you have to obtain by defeating them in a battle.
Frontier Brains
| File:Battle Frontier IIIlogo.png Generation III Battle Frontier Brains File:Battle Frontier IIIlogo.png | ||||||||
|---|---|---|---|---|---|---|---|---|
| Frontier Brains | Facility | Pokémon | Symbol | |||||
 Salon Maiden Anabel |
Battle Tower | First Battle: Second Battle: |
Ability Symbol | |||||
 Palace Maven Spenser |
Battle Palace | First Battle: Second Battle: |
Spirit Symbol | |||||
 Factory Head Noland |
Battle Factory | First Battle: Random Second Battle: Random |
Knowledge Symbol | |||||
Pyramid King Brandon |
Battle Pyramid | First Battl: Second Battle: |
Brave Symbol | |||||
 Dome Ace Tucker |
Battle Dome | First Battle: Second Battle: |
Tactics Symbol | |||||
 Arena Tycoon Greta |
Battle Arena | First Battle: Second Battle: |
Guts Symbol | |||||
 Pike Queen Lucy |
Battle Pike | First battle: Second Battle: |
File:LuckSSIlver.png Luck Symbol | |||||
Facilities
Battle Tower

Battle Tower
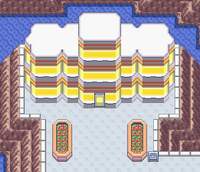
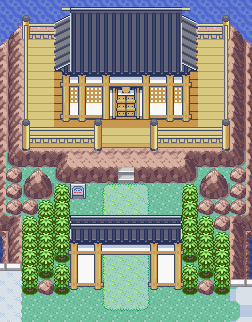
The Battle Tower is one of the Battle Frontier facilities in Hoenn. It is a standard 3-vs-3 single or 4-vs-4 double battle battle. The more wins you get, the harder the opponents get.
Battle Palace
Battle Palace
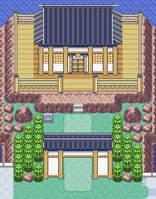
In the Battle Palace, you are faced with a challenge that is based entirely on how much your Pokémon trust you. Your Pokémon are put through a series of battles to show whether they trust you or not. You will not be able to choose which moves your Pokémon will use. There is a girl in a building at the Battle Frontier that will tell you the strategy of the Pokémon you have and if it will change if it's health gets low.
Battle Factory
Battle Factory
In the Battle Factory, you will go through the Battle Swap Challenge. Your knowledge of Pokémon will be tested. Your Pokémon will be traded (temporarily) for rental Pokémon for you to battle with. On the "porch", your aide will give you some stats on your opponent and his battle style. You may incorporate this into your strategy if you want. After each match, you will be able to swap one of your rental Pokémon with a Pokémon from the previous opponent's team.
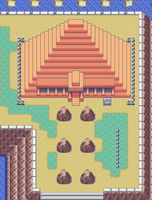
Battle Pyramid
Battle Pyramid
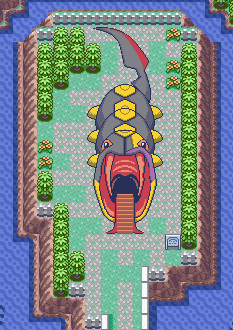
The Battle Pyramid is a challenge at the Battle Frontier that you have to pass to get the Brave Symbol. The Frontier Brain is Pyramid King Brandon. To pass you have to look for a blue warp square.
In the Battle Pyramid, the aim is to reach the top of the pyramid without your Pokémon fainting. You are faced with a dark room with a maze inside. You may encounter wild Pokémon in the pyramid, but you cannot catch them. Your Bag is switched for a Battle Bag, containing a Hyper Potion and a Max Ether. You may also find items dotted around the place, such as Ether and Fluffy Tail. If you succeed in your goal, your Battle Bag will be reserved for your later challenges. If you fail, its contents will be reset, leaving you with just Hyper Potion and Max Ether.
The Pyramid is a challenge in which you must explore the pyramid and try to reach the top. There are seven floors of skilled trainers and also wild Pokémon.
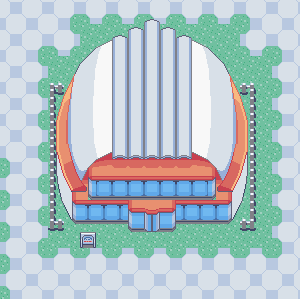
Battle Dome
Battle Dome
In the Battle Dome, you will go through a tournament involving Preliminary, Quarter Final, Semi-Final and Final rounds. You will be faced with three opponents. If you defeat them all, you will complete the Battle Dome challenge. The aim of this facility is to test your tactics.
Battle Arena
Battle Arena
The Battle Arena is a challenge at the Battle Frontier that you have to pass to get the Guts Symbol. The Frontier Brain is Arena Tycoon Greta. To pass you have to win judged battles.
In the Battle Arena, you and your Pokémon are put through a series of KO matches. You have three turns to faint your opponent's Pokémon, or the Judge will determine who is the winner. Your Pokémon are judged in three categories: Skill, Mind and Vitality. If your Pokémon has more points than your opponent's, your opponent's Pokémon is judged the loser. If your opponent's Pokémon has the most points, then your Pokémon will faint.
You have to battle seven trainers consecutively and after three turns of battling, the referee decides who wins.
Battle Pike
Battle Pike
The Battle Pike is a test of your luck. You may find your Pokémon will be burned or frozen [etc.] by a Pokémon with a Timid Nature. Your Bag and Pokénav will not be available to you.
Pike Queen Lucy will confront you after you complete 27 successive rooms, which means that you take the Battle Pike challenge two times in a row. She holds a Luck Symbol. She has a Seviper, Shuckle and Milotic for Silver Symbol.
If you are aiming for the Gold Symbol, you have to complete another 139 successive rooms, which means you have to take the Battle Pike challenge ten times in a row. She have a Seviper, Steelix and Gyarados.
Pokémon
Sudowoodo
Sudowoodo is located next to the Battle Palace. If you ask an old lady standing in between the trees, she will probably say something about a weird tree. It is located near the waterfall. Approach the tree and attempt to water it with the Wailmer Pail. The tree springs to life, revealing that it's no ordinary tree. Battle Sudowoodo to capture it. It is at Level 40.
Artisan Cave
After capturing Sudowoodo, surf down the waterfall and follow the river to the left. You will find the cave. This is the entrance to the Artisan Cave. This is the only place in Pokémon Emerald where you can catch a Smeargle, and the place is full of them. If you examine the rocks in the cave, you will get power-up items such as Calcium. There are two entrances to Artisan Cave, one is already stated on the first paragraph, the other one is next to the Battle Tower. The second one cannot be assessed, but you can exit from here and jump down the ledges. There is a boy in front of the ledges with green cap saying something about a tail. You will know it - that's Smeargle.
Template:Hoenn